Ninja Foodi Pot Pie – Easy Turkey Pot Pie
on Dec 29, 2020, Updated Sep 21, 2023
This post may contain affiliate links. Please read our disclosure policy.
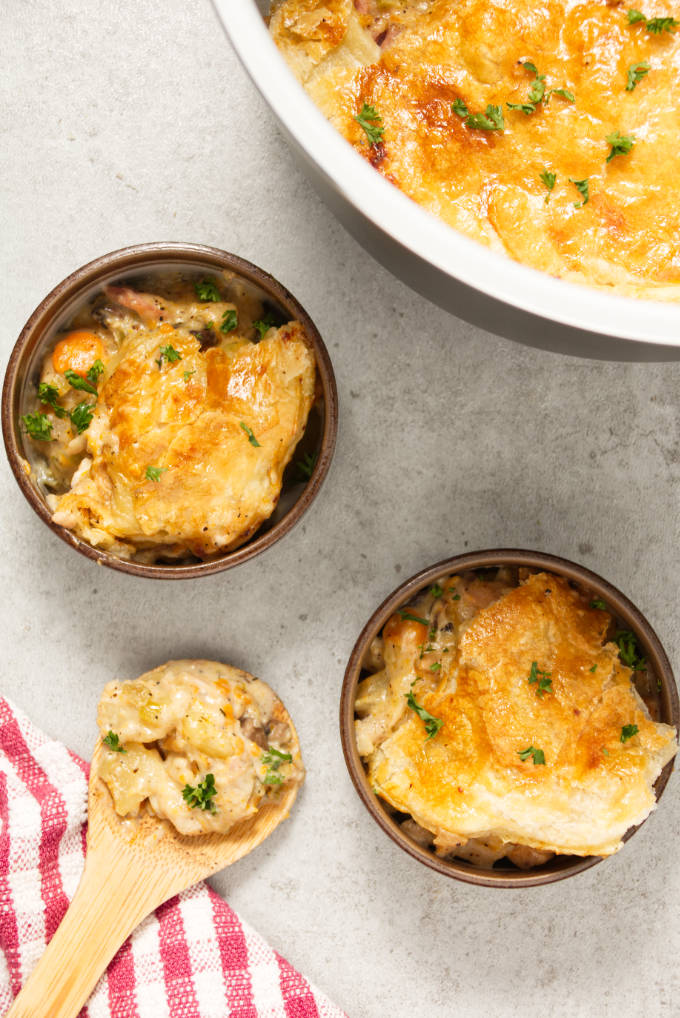
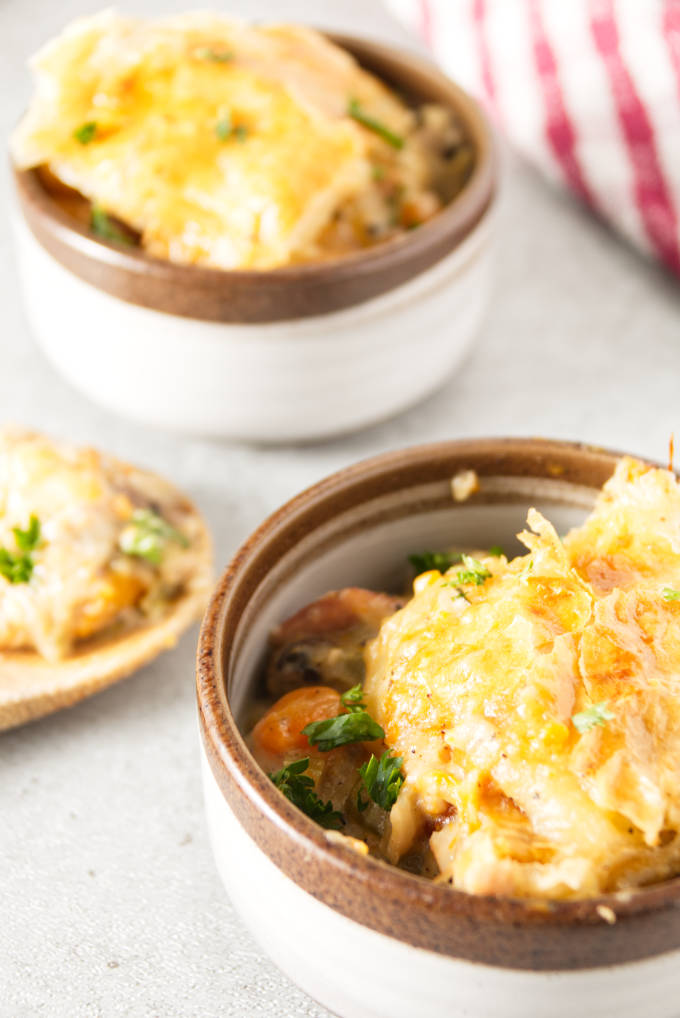
Pot pie is one of the most comforting foods, and the Ninja Foodi makes it incredibly easy to turn your heap of turkey leftovers into a delicious pot pie. Making a pot pie is usually time-consuming, but the Ninja Foodi allows you to use a single pot to quickly rustle up one of the tastiest pot pies you will ever taste. The air fryer function makes perfect use of the puff pastry, getting it to a tender yet crispy pie crust.
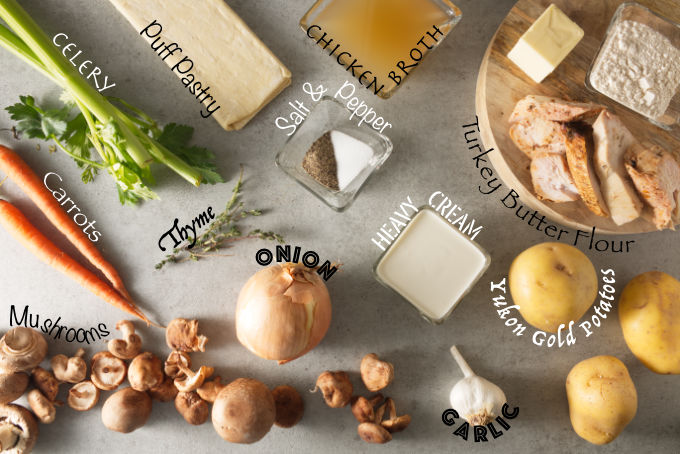
Ingredients for the best turkey pot pie
The staple behind any great pot pie recipe is the abundance of fresh vegetables. I like my pot pie to be hearty and full of flavor, so this one is loaded!
- Leftover turkey (or chicken)
- Unsalted butter
- Onion
- Mushroom
- Garlic
- Carrots
- Celery
- Yukon Gold potatoes
- Chicken broth
- Flour
- Heavy cream
- Puff pastry
- Salt
- Pepper
- Fresh thyme
What type of potatoes for pot pie?
Yukon Gold potatoes are an all-purpose potato. They are favored for their buttery, nutty flavor and are much more tender than a Russet potato. The skin on a Yukon Gold is fragile and tender, so you don’t need to worry about peeling the potato. I like to use Yukon Gold potatoes in my pot pie because they are so tender and creamy and because they will not overpower the pie with a chewy chunk of starch.
You can also use other all-purpose or tender potatoes like the red potato or purple potato. This can also be a creative way to add more color to your turkey pot pie.
This post may contain affiliate links. Please read our disclosure policy.How to make the Ninja Foodi turkey pot pie
Step 1: sauté the veggies
Turn your Ninja Foodi on to sauté mode and medium to medium-high heat. Place the butter in the pot and allow it to melt completely. Add the onions, carrots, celery, thyme, garlic, mushrooms, salt, and pepper to the pot. Sauté for about 5 minutes or until the onions become translucent and the garlic fills the room with fragrance.
Step 2: add the turkey and potatoes
Dump in the potatoes, chicken broth, and the turkey (or chicken). Sauté for another 5 minutes or so. The potatoes will become tender after they are fully cooked under pressure.
Step 3: pressure cook
Turn the Ninja Foodi to pressure mode and secure the pressure lid to the lock position. Be sure to set the pressure release valve to “seal” so that it can build pressure. Cook in pressure mode for 10 minutes at high and then release the pressure carefully, so you do not burn yourself. I use a rag over the pressure release valve to keep the steam water droplets from coating my nearby cabinets or burning my hands. Once the pressure is released, unlock the lid and tilt it away from you when opening. Just in case there is any residual steam, you want it to escape towards the Ninja Foodi’s back rather than toward your face while opening it.
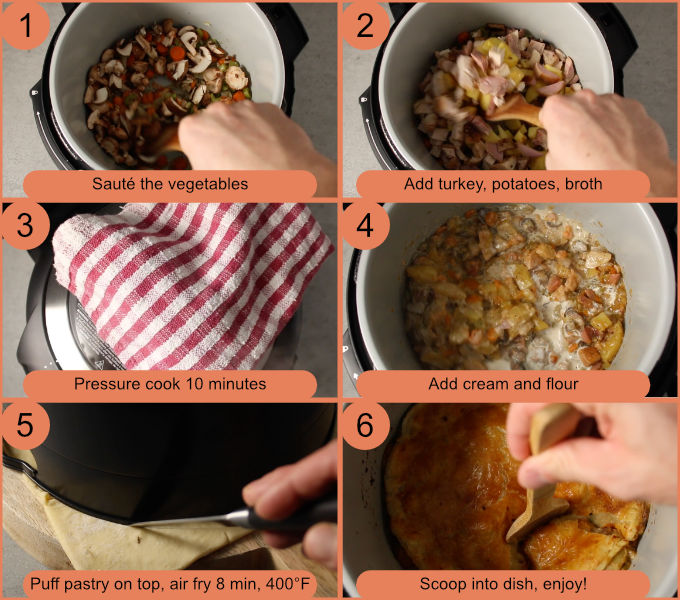
Step 4: add the flour and cream
Stir in the flour and the cream. Be sure to mix it fully and allow the liquids to thicken up. The mixture should be fairly thick and not runny; after all, we are cooking a pot pie, not a stew. If you notice the mixture is too runny, turn your Ninja Foodi to sauté mode at medium heat and cook for an additional 5 minutes. If it is still too runny, you can add more flour, 1 tablespoon at a time.
Step 5: cover with puff pastry and air fry
Take your one sheet of thawed puff pastry and roll it out. We want to be sure it is big enough to completely coat the turkey pot pie in the Ninja Foodi pot. Use the inner air fryer basket from the Ninja Foodi as a template to cut out a circular piece of puff pastry. The black air fryer basket is about 1 inch smaller than the pot, so you will want to roll it out a couple of times to make it just slightly bigger. Then, carefully drape your puff pastry over the turkey pot pie mixture.
For a better brown color on your puff pastry, you can give it an egg wash. Use a pastry brush or silicone brush to wash some beaten egg over the top of the puff pastry.
Set your Ninja Foodi to air fry mode and cook it at 400°F for 8 minutes or until the crust is golden brown and crispy.
Step 6: scoop and dish it up!
Use a wooden spoon so you do not scratch the non-stick coating, and carefully scoop the turkey pot pie out of the Ninja Foodi and place it in a bowl. Enjoy!
What else is cooking?
The preamble to this delicious Ninja Foodi turkey pot pie is some incredible turkey. Check out this brown sugar bourbon brined Traeger smoked turkey. The brown sugar bourbon brine makes it super tender and moist. The brown sugar bourbon glaze is deliciously sweet, and the smokiness from the bourbon helps amp up the flavor! You will have plenty of leftovers for lots of pot pie afterward!
For a more traditional turkey during the holidays, check out this wet brined Traeger smoked turkey. There really is no better way to cook a turkey; the Traeger always produces amazing birds.
If you need some sides for your turkey meal, check out this air fryer baked potato. The best part is loading it up with all the goodies.
Tell me what you think of the Ninja Foodi turkey pot pie!
Did you try out this recipe? Please give it a 5-star review! Also, snap a picture of it and share it with me on Instagram using the hashtag #alicensetogrill.
CONNECT WITH A LICENSE TO GRILL!
Be sure to follow us on our social media accounts.
Did you make this recipe? Tell us about it in the comments below!
Ninja Foodi Turkey Pot Pie
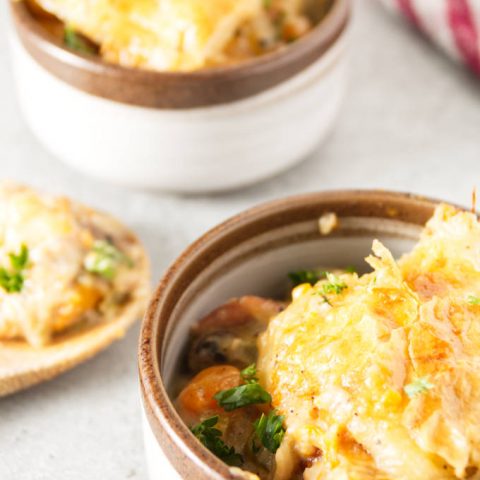
Pot pie is one of the most comforting foods, and the Ninja Foodi makes it incredibly easy to turn your heap of turkey leftovers into a delicious pot pie. It is packed with loads of vegetables and just enough turkey so that every bite is hearty and filling. You may find this to be your new favorite way to enjoy your holiday leftovers.
Ingredients
- 2 pounds leftover turkey (or chicken), cut into 1-inch cubes
- 4 tablespoons unsalted butter
- 1 onion, diced
- 1 cup mushrooms, sliced
- 4 garlic cloves, minced
- 1 cup chopped carrots
- 1 cup chopped celery
- 2 cups Yukon Gold potatoes, diced
- 1 cup chicken broth
- 1/4 cup flour
- ½ cup heavy cream
- 1 sheet puff pastry
- ½ teaspoon salt
- ½ teaspoon ground black pepper
- 1 teaspoon fresh thyme
Instructions
- Sauté the veggies. Turn your Ninja Foodi to saute mode on medium to high heat. Throw in your butter and once it melts, add the onions, carrots, celery, thyme, garlic, mushrooms, salt, and pepper. Allow the veggies to cook for 5 minutes or until the onions start to turn translucent.
- Add the turkey and potatoes. Now you can add the turkey (or chicken) along with the potatoes and the chicken broth. Sauté for another 5 minutes.
- Pressure cook. Turn your Ninja Foodi to pressure mode, secure the pressure lid, and set the pressure release valve to "seal". Cook for 10 minutes on high. Then you can immediately release the pressure.
- Thicken. Add in the flour and cream to the pot pie filling. It should thicken up after just a couple of minutes.
- Add on the crust. Use the black air fryer basket from the Ninja Foodi as a template to cut your puff pastry. First, roll out your puff pastry to ensure it is thick enough to cover the entire diameter of the Ninja Foodi pot. Place the air fryer basket on top of the puff pastry and cut it around the outside. You may need to roll it to make it slightly bigger after cutting it since the air fryer basket is slightly smaller than the Ninja Foodi pot.
- Crisp it up. Close the air fryer lid and set the Ninja Foodi to air fry mode. Cook it for 8 minutes at 400°F. You can first give the puff pastry an egg wash to make it turn a beautiful gold color. Use a pastry or a silicone brush to lightly coat the top of the puff pastry with a beaten egg.
- Scoop and dish. Use a wooden spoon to scoop your turkey pot pie out and dish it into a bowl. Enjoy!
Notes
- After you add the cream and flour, you shouldn't need any additional heat to thicken. If you notice the mixture is too runny, turn your Ninja Foodi to sauté mode at medium heat and cook for an additional 5 minutes. If it is still too runny, you can add more flour, 1 tablespoon at a time.
- Once you release the pressure from the Ninja Foodi, always open the lid away from you. If there happens to be any residual pressure, moist air and hot water droplets could injure you. If you tilt the lid so that it opens away from you, the lid will shield you from any potential burns.
- Use wooden or silicone utensils inside your Ninja Foodi. The non-stick surface is fragile, and a metal utensil can cause damage.
Recommended Products
As an Amazon Associate and member of other affiliate programs, I earn from qualifying purchases.
Nutrition Information:
Yield: 8 Serving Size: 1Amount Per Serving: Calories: 414Total Fat: 21gSaturated Fat: 10gTrans Fat: 0gUnsaturated Fat: 10gCholesterol: 156mgSodium: 412mgCarbohydrates: 19gFiber: 3gSugar: 3gProtein: 36g
Nutrition information is a guideline only, is calculated automatically by third party software, and absolute accuracy is not guaranteed.



Gotta give this another 5* rating, both for taste of the final product and how well-organized Josh’s instructions were. Definitely was a snap to make. We skipped right over the leftovers part and went with this as our Thanksgiving main course today. Double thumbs up from my very finicky daughter. My son went back for 3rds.
I used a 40 oz bag of frozen chicken tenderloins, and a 2 pack of refrigerated pie crusts so it had both a top and a bottom. The 3-piece baking accessories set Ninja sells is well worth the 20 bucks they change for it (the ingredient amounts in this recipe as listed were a perfect fit for the baking insert).
The family has already requested a re-do with a beef filling next time. I was going to use some eye of round I have in the freezer, unless you would recommend a different cut Josh ?
Hey David, thank you for the great comment and feedback! I am happy that you and the family enjoyed it!!
Let me know how the beef version turns out. Eye of round, chuck, or any roast should be great. It will get nice and tender in the pressure cooker.